Choose the test that matches the instruction sheet in your kit, then follow the steps.
Vaginal sample (swab)
Trichomonas / Candida Test
LoveHealth
How to Collect a Vaginal Sample
Genital Trichomonas / Candida Test
What you need
Swab
Used to collect vaginal discharge, which is submitted as the sample.
The handle becomes the cap of the storage container.
Storage container
Place the swab in it after collection and submit it.
Caution
Do not collect a sample after vaginal douching or sexual intercourse, or during your period.
Do not put the gel from the container in your mouth.
Do not let the gel in the container touch mucous membranes.
Do not put the swab into the gel before collecting the sample.
Do not let the swab break before or during collection.
Take care not to injure the mucous membranes.
1
Preparation
1
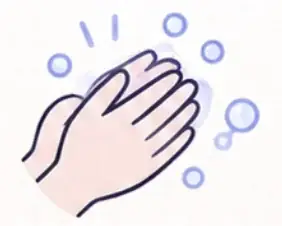
Wash your hands well before opening the bag.
* Use promptly after opening.
2
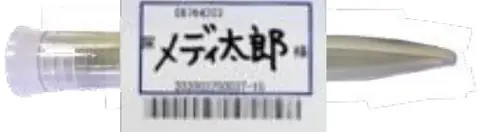
Before you begin, write your name on the blue-framed [性器] barcode label and attach it to the container.
Write your name on the blue-framed barcode label and attach it in this direction.
2
Collect the sample
1
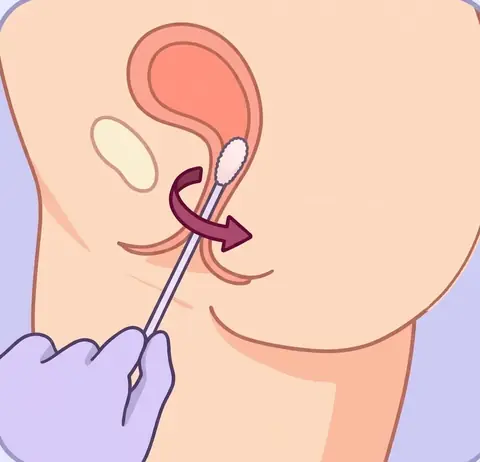
Hold the swab by the handle. In a squatting or similar position, gently open the entrance to the vagina.
* Do not put the swab into the gel in the container before collecting the sample.
2
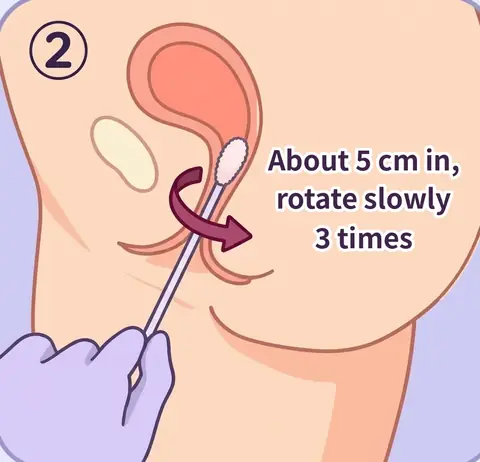
Insert the swab about 5 cm into the vagina and slowly rotate it 3 times.
3
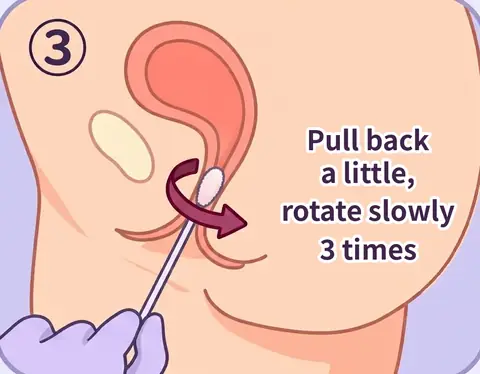
Pull the swab back slightly (about 2 cm) and slowly rotate it 3 times.
4
Once more, slowly rotate the swab 3 times at the depths in steps ② and ③.
5
Gently pull the swab straight out without putting force on it.
* Do not use too much force or press hard, or the swab may break.
* Be careful not to injure the mucous membranes.
* Do not insert it deep into the vagina.
3
Put the swab in the container
1
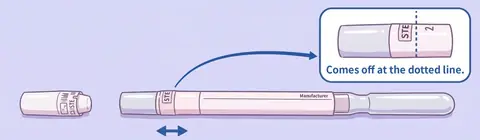
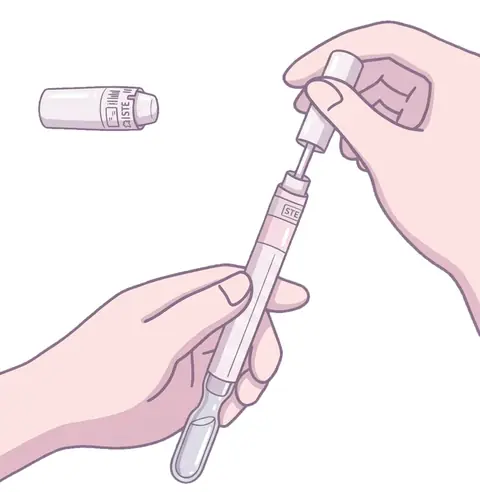
Remove the cap of the storage container.
It comes off at the dotted line. Throw the cap away.
2
Put the used swab into the storage container without letting it touch anything.
3
Push the handle in firmly to close the container.
Your genital sample is ready!
Gonorrhea / Chlamydia Test
LoveHealth
How to Collect a Vaginal Sample
Genital Gonorrhea / Chlamydia Test
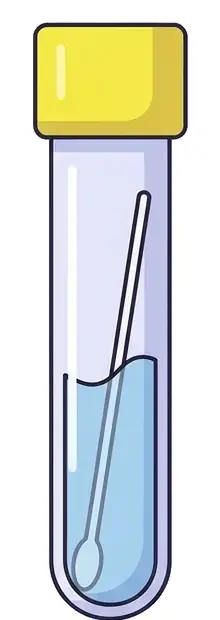
What you need
Use the thin swab
Used to collect vaginal discharge, which is submitted as the sample.
Do NOT use the thick swab
Storage container
Place the swab in it after collection and submit it.
Caution
Do not collect a sample after vaginal douching or sexual intercourse, or during your period.
Do not put the liquid from the container in your mouth.
Do not let the liquid in the container touch your skin or mucous membranes.
Do not pour out the liquid in the container. (If there is too little liquid, the test cannot be done.)
Do not dip the swab in the liquid before collecting the sample.
Do not let the swab break before or during collection. (The black line on the swab shaft is the break line for snapping it when you put it into the container after collection.)
Take care not to injure the mucous membranes.
1
Preparation
1
Wash your hands well before opening the bag.
* Use promptly after opening.
2
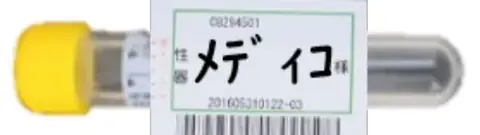
Before you begin, write your name on the green-framed [性器] barcode label and attach it to the yellow-capped container.
Write your name on the green-framed barcode label and attach it in this direction.
2
Collect the sample
1
Take out the thin swab.
* Do not dip the swab in the liquid in the container before collecting the sample.
2
Hold the swab on the cotton-tip side of the break line.
Insert only up to about here (about 5 cm). [Do not insert any deeper.]
3
In a squatting or similar position, gently open the entrance to the vagina, insert the swab about 5 cm into the vagina, gently rotate it 5 times in the same direction, then slowly pull it out.
* Do not use too much force or press hard, or the swab may break.
* Be careful not to injure the mucous membranes.
* Do not insert it deeper than the break line.
3
Put the swab in the container
1
Open the yellow-capped container.
* Be careful not to spill the liquid in the container.
2
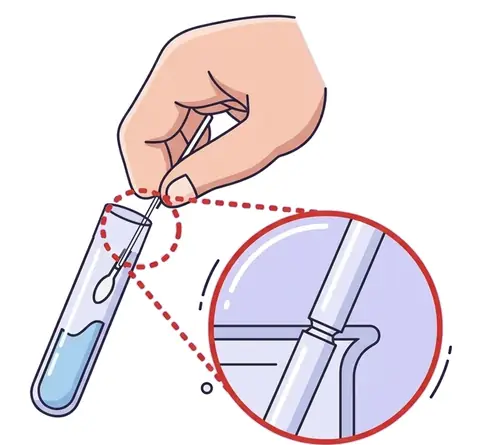
Place the swab in the container without letting the tip touch the liquid. Line up the break line near the middle of the swab with the rim of the container and bend it against the rim to snap the shaft.
* Put the used swab into the container without letting it touch anything.
* Be careful not to splash the liquid in the container.
3
Leave the cotton-tip end immersed in the liquid and close the cap tightly.
* Close the cap only after the swab is inside. The test cannot be done without the swab.
* Throw away the snapped-off part of the shaft.
Your genital sample is ready!
Urine sample
Gonorrhea / Chlamydia Test
LoveHealth
How to Collect a Urine Sample
Genital Gonorrhea / Chlamydia Test
What you need
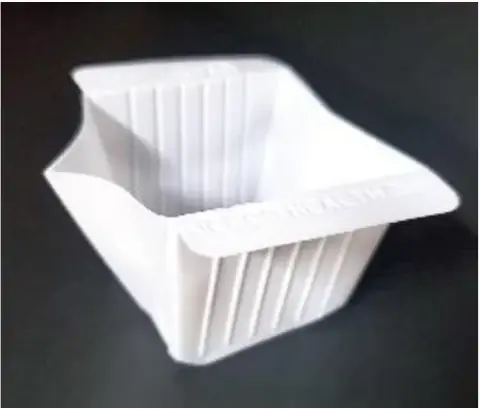
Urine cup
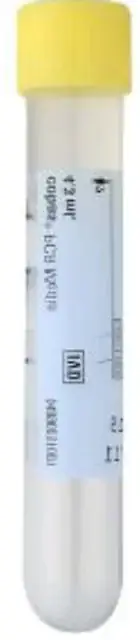
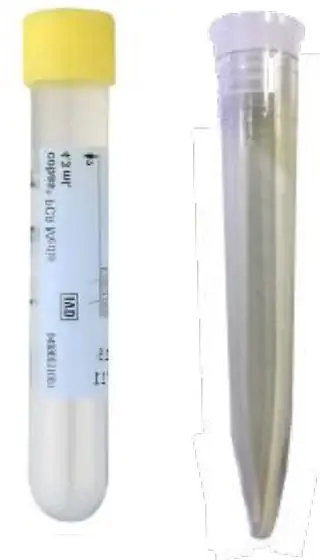
Yellow-capped container
Caution
Do not put the liquid from the container in your mouth.
Do not let the liquid in the container touch your skin or mucous membranes.
Do not pour out the liquid in the container. (If there is too little liquid, the test cannot be done.)
Important notes on collection
Collect the first part of your urine stream.
* Bacteria in the urethra are flushed out with urine, so the first part of the stream is best for this test.
Wait at least 1 hour after you last urinated before collecting.
* As long as enough time has passed since you last urinated, it does not have to be your first urine of the morning.
1
Collect the sample
1
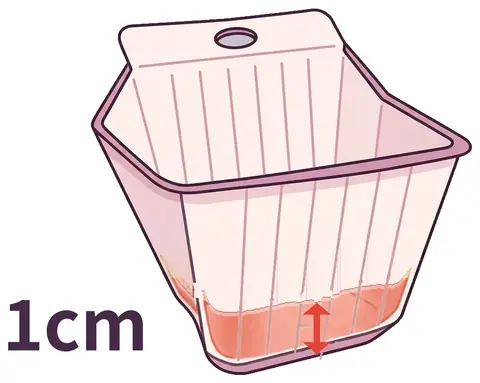
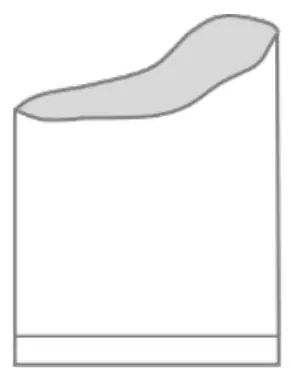
Collect the first part of your urine stream in the urine cup, about 1 cm from the bottom.
* Too much urine dilutes the sample and lowers test sensitivity.
2
Put into the container
1
Open the yellow-capped container.
* The liquid in the container is a preservative needed for the test. Be careful not to spill it.
2
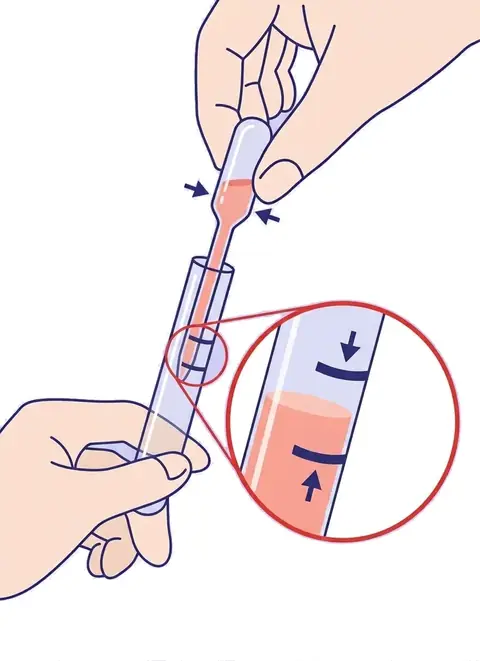
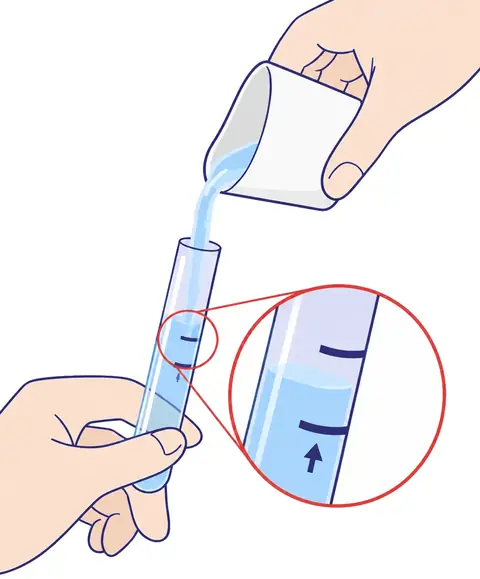
Use the dropper to take urine from the cup and transfer it to the container. Fill it so the level is between the two black lines marked on the container.
* The amount is correct if the liquid is between the two black lines on the container.
3
Close the yellow cap tightly.
4
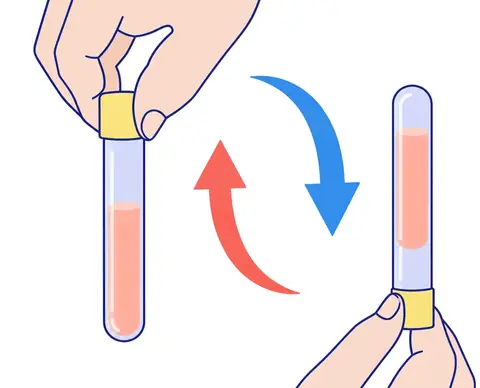
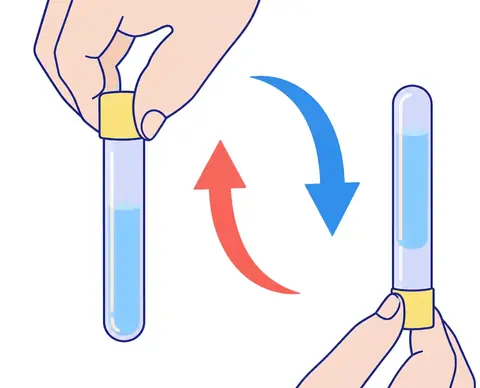
Slowly turn the container upside down about 5 times to mix the urine with the preservative.
3
Finish
1
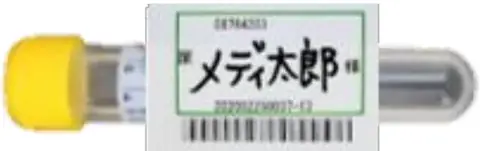
Write your name on the green-framed [尿] barcode label and attach it to the container.
Write your name on the green-framed barcode label and attach it in this direction to the container with urine.
2
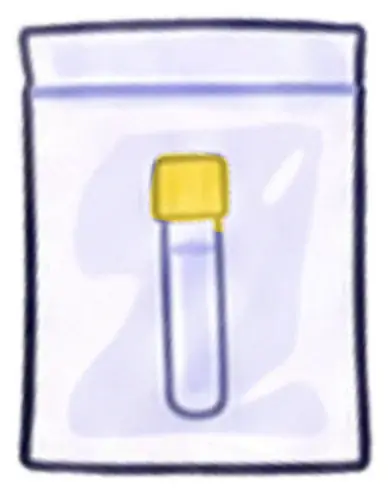
Put it in the enclosed zip bag and submit it.
Your urine sample is ready!
Gonorrhea / Chlamydia + Trichomonas / Candida Test
LoveHealth
How to Collect a Urine Sample
Genital Gonorrhea / Chlamydia Test Trichomonas / Candida Test
What you need
Urine cup
Yellow-capped container
White-capped container
Important notes on collection
Collect the first part of your urine stream.
* Bacteria in the urethra are flushed out with urine, so the first part of the stream is best for this test.
Wait at least 1 hour after you last urinated before collecting.
* As long as enough time has passed since you last urinated, it does not have to be your first urine of the morning.
Caution: yellow-capped container
Do not put the liquid from the container in your mouth.
Do not let the liquid in the container touch your skin or mucous membranes.
Do not pour out the liquid in the container. (If there is too little liquid, the test cannot be done.)
1
Collect the sample
1
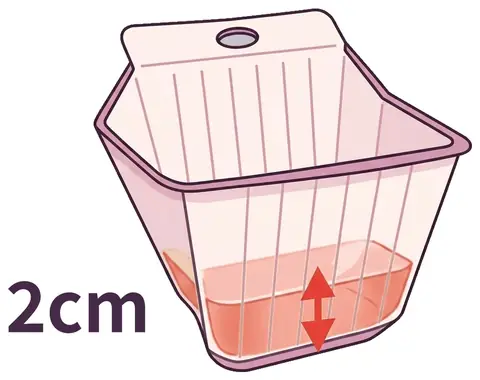
Collect the first part of your urine stream in the urine cup, about 2 cm from the bottom.
* Too much urine dilutes the sample and lowers test sensitivity.
* Be careful not to knock over the urine cup.
2
Put into the yellow-capped container
1
Open the yellow-capped container.
* The liquid in the container is a preservative. Be careful not to spill it.
2
Use the dropper to take urine from the cup and transfer it to the container. Fill it so the level is between the two black lines marked on the container.
* The amount is correct if the liquid is between the two black lines on the container.
3
Close the yellow cap tightly.
4
Slowly turn the container upside down about 5 times to mix the urine with the preservative.
3
Put into the white-capped container
1
Open the white-capped container.
2
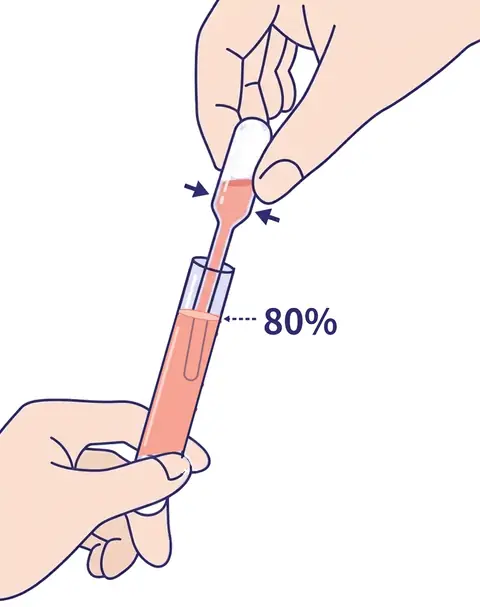
Use the dropper to take urine from the cup and transfer it to the container. Fill it to about 80% full.
3
Close the white cap tightly.
4
Finish
1
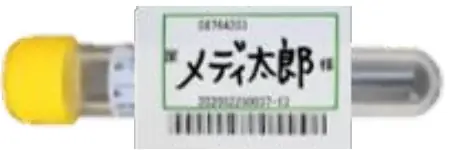
Write your name on the green-framed [尿] barcode label and attach it to the yellow-capped container.
2
Write your name on the blue-framed [尿] barcode label and attach it to the white-capped container.
Attach the label in this direction.
* Put it in the enclosed zip bag and submit it.
Throat sample (gargle)
Throat Gonorrhea / Chlamydia Test
LoveHealth
How to Collect a Throat Sample
Throat Gonorrhea / Chlamydia Test
What you need
Paper cup for gargle sample
Yellow-capped container
Caution
Do not put the liquid from the container in your mouth.
Do not let the liquid in the container touch your skin or mucous membranes.
Do not pour out the liquid in the container. (If there is too little liquid, the test cannot be done.)
Important notes on collection
For 1–2 hours before collecting, do not eat, brush your teeth or gargle.
1
Collect the sample
1
Fill the cup with about 15 mL of tap water (about 2–3 cm deep).
2
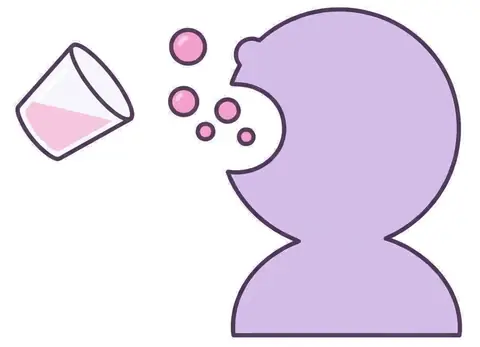
Take all the water from the cup into your mouth, tilt your head back and gargle vigorously for 10 seconds.
3
After gargling, spit all the water back into the cup to collect it.
2
Put into the container
1
Open the yellow-capped container.
* The liquid in the container is a preservative needed for the test. Be careful not to spill it.
2
Transfer the gargle sample from the cup to the container. Fill it so the level is between the two black lines marked on the container.
* The amount is correct if the liquid is between the two black lines on the container.
3
Close the yellow cap tightly.
4
Slowly turn the container upside down about 5 times to mix the gargle sample with the preservative.
3
Finish
1
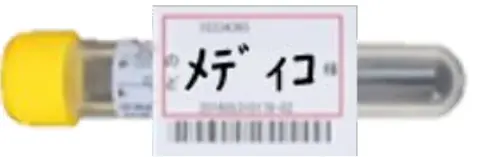
Write your name on the red-framed [のど] barcode label and attach it to the container.
Write your name on the red-framed barcode label and attach it in this direction to the container with the gargle sample.